3 September 2026
Start Off Piste in One Day: A Practical Plan for Intermediates
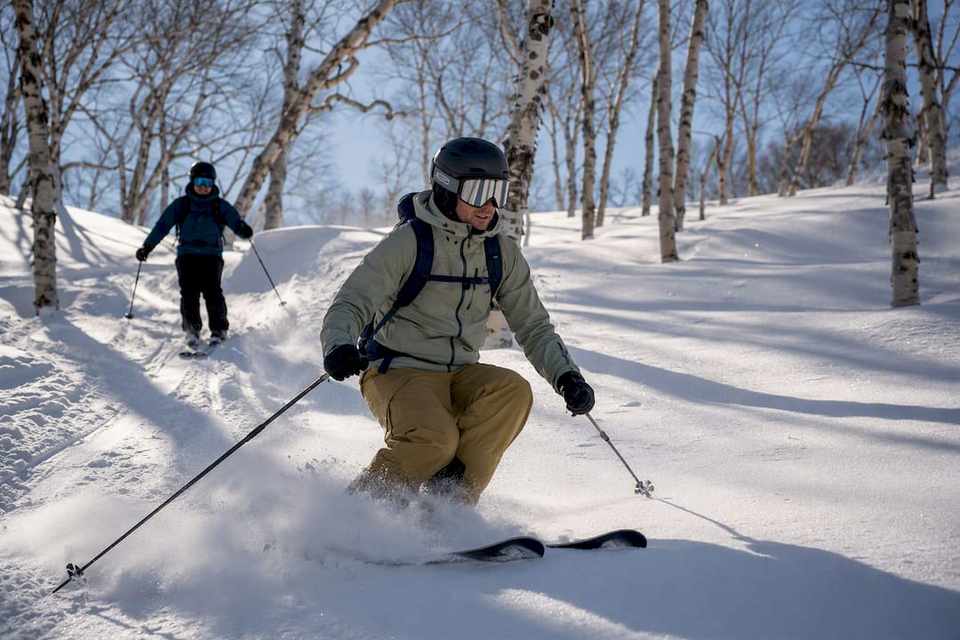
Off-piste skiing means skiing on ungroomed, unpatrolled snow outside or beside a resort’s marked runs. It rewards skiers with untouched powder and quiet terrain, but it carries real avalanche and hazard risk that groomed slopes don’t. It’s appropriate once you have solid on-piste skills, the right rescue gear, and either formal training or a qualified guide.
TL;DR:
- Off-piste skiing involves unpatrolled terrain outside marked resort runs, increasing avalanche risk unless skiers have solid skills and proper rescue gear.
- Terrain features such as slope angle and aspect significantly influence avalanche danger, with most slab avalanches occurring on slopes between 30 and 45 degrees.
- Essential rescue equipment includes a transceiver, probe, shovel, and optional airbag, and all should be practiced with regularly to be effective in emergencies.
- Starting with guided lessons and completing avalanche awareness courses are crucial steps before venturing into unguided off-piste skiing.
- Picking resorts with guided programs, booking lessons in advance, and checking local avalanche bulletins help manage risks and ensure safer off-piste experiences.
Table of Contents
- What’s the Difference Between Off-Piste, Backcountry, and Sidecountry?
- How Do Snow Type and Terrain Features Change the Risk?
- What Gear Do You Need for Off-Piste Skiing?
- What Techniques Do You Need for Off-Piste Skiing?
- How Do You Assess Avalanche Risk Before Skiing Off-Piste?
- How Do You Start Skiing Off-Piste Safely?
- How Do You Plan a Trip That Includes Off-Piste Skiing?
- A Realistic Path Into Off-Piste Skiing
- Find a Guided Off-Piste Trip Through Bergme
- Sources
What’s the Difference Between Off-Piste, Backcountry, and Sidecountry?
In Europe, “off-piste” refers to any snow outside marked, patrolled runs, even terrain right beside a lift line. In the US, the equivalent term is often “backcountry,” though Americans also use “off-piste” and “off-trail” interchangeably. Both describe unmarked or unpatrolled terrain where rescue response and avalanche mitigation aren’t guaranteed the way they are on groomed pistes.
Access method changes the risk profile substantially:
- Frontcountry: patrolled runs, marked and maintained.
- Sidecountry: reached from a lift but outside the patrolled boundary, no mitigation or rescue guarantee.
- Slackcountry: a looser term for lift-accessed backcountry requiring a short hike.
- Backcountry: remote terrain reached under your own power, no lift access at all.
The National Ski Areas Association actively discourages the term “sidecountry” because it implies a safety net that doesn’t exist. Once you cross a resort boundary rope, you’re in avalanche terrain regardless of how close the chairlift looks.
How Do Snow Type and Terrain Features Change the Risk?
Powder, crust, and variable snow each demand different technique and different judgment calls. Fresh powder floats skis and forgives mistakes, but tracked-out powder turns into crust or sastrugi within hours, and crust can grab a tip and throw you off balance without warning. Wind-loaded slopes and sun-baked aspects behave completely differently even on the same mountain the same day.

Slope angle matters more than most beginners realize. Avalanches release most often on slopes between 30 and 45 degrees, and aspect (which direction a slope faces) determines how wind and sun affect the snowpack. A north-facing chute holding cold powder in the morning might be a wet slide risk by afternoon.
For your first sessions, stick to:
- Lift-accessible powder fields with a clear line of sight to the run below
- Gentler pitches under 25 degrees where terrain traps are minimal
- Tree-lined runs with good snow contrast, which help with depth perception
Pro Tip: Ski cut a suspect slope one skier at a time, watching from a safe spot, rather than dropping in as a group. It’s a basic habit that catches problems before everyone’s committed.
What Gear Do You Need for Off-Piste Skiing?
Ski width and weight involve a real tradeoff. Wider skis (100mm+ underfoot) float better in deep snow but add swing weight and make quick edge changes harder on crust. Backcountry tourers often choose lighter, narrower skis to save energy on the climb, accepting less flotation in exchange. If you’re unsure what suits your local snowpack, demoing skis before buying saves you from an expensive mismatch.
Bindings split into two camps: tech (pin) bindings, built for uphill efficiency and touring, and frame bindings, which feel more like standard alpine bindings but weigh more. Boot fit deserves just as much attention as ski choice. A loose or poorly fitted boot costs you edge control exactly when variable snow demands the most precision.
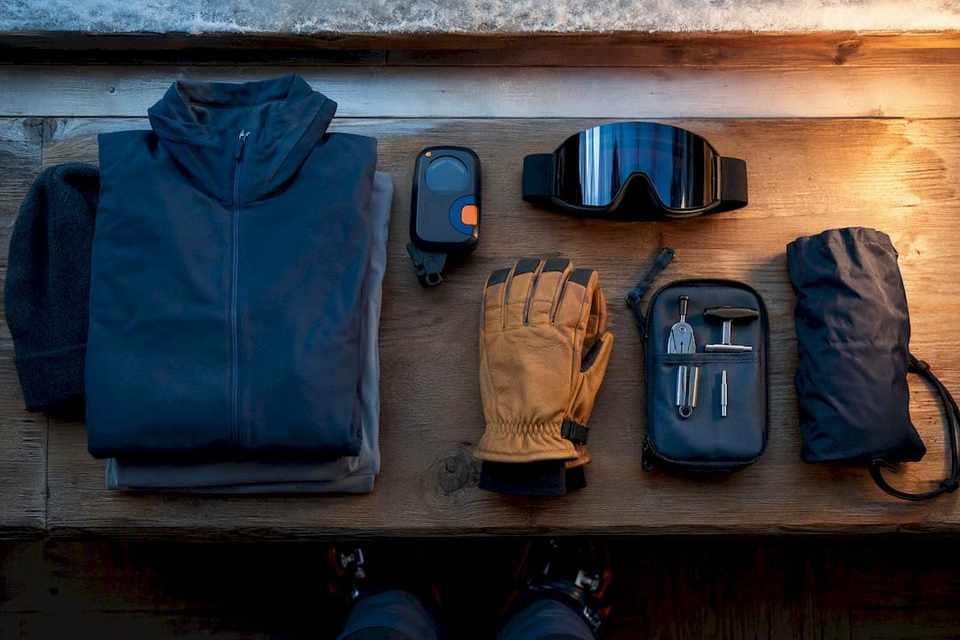
Rescue equipment isn’t optional. The standard kit is:
- Avalanche transceiver: worn on your body, used to locate a buried partner
- Probe: confirms exact burial depth before you dig
- Shovel: for the actual excavation
- Avalanche airbag (optional): can reduce burial depth and severity, though it’s a supplement to training, not a replacement for it
Roughly one avalanche fatality occurs per month in the United States, and outcomes hinge on how fast a partner can locate and dig. Gear without practiced skill is close to useless in that window.
Round out your kit with a helmet, goggles rated for flat light, layered clothing you can adjust on the move, and a small repair kit for bindings or poles. Renting avalanche gear and touring skis at the resort is a smart way to test your setup before committing to a purchase.
What Techniques Do You Need for Off-Piste Skiing?
Three techniques come up again and again in off-piste instruction, and each solves a specific problem:
- Blocking pole plant: a firm, early pole plant that anchors your upper body and helps you initiate a turn on steep or uneven snow, rather than a light touch-and-go plant used on groomed runs.
- Hop turn: a quick, both-skis-together jump turn used on narrow chutes or steep pitches where a normal carved turn would pick up too much speed.
- Kick turn: a stationary maneuver for reversing direction on very steep terrain or during a traverse, essentially pivoting one ski at a time while stopped.
These three core techniques show up in nearly every off-piste lesson curriculum for good reason. They cover the situations where standard piste technique breaks down.
Your stance changes in powder, too. A centered, slightly wider stance with active knee flex keeps both skis floating evenly. Leaning too far forward, a common instinct from piste skiing, buries your tips and stalls the turn. A more centered position with rhythmic pole plants helps you initiate turns smoothly instead of fighting the snow.
Practice progression matters more than raw talent. Start on low-angle, wide-open powder to groove the stance and pole timing. Then move to guided runs with some pitch and trees, where a lesson or a season’s worth of video review can catch habits you can’t feel yourself.
Pro Tip: Film a few runs on your phone. Most skiers are shocked at how far forward they’re actually leaning compared to how it feels in the moment.
How Do You Assess Avalanche Risk Before Skiing Off-Piste?
Avalanche risk isn’t random. It follows patterns tied to recent storms, wind direction, temperature swings, and slope angle. A few heuristics carry real weight:
- Fresh snow plus wind-loading equals elevated risk, especially on lee slopes.
- Slopes steeper than 30 degrees are where most slab avalanches release.
- Rapid warming after a cold snap can trigger wet slides even on terrain that felt stable that morning.
- A recent avalanche nearby is the clearest sign the snowpack is already unstable.
Rescue kit only works if you can use it under pressure. Practicing transceiver searches on your own, ideally timed, is what separates a five-minute recovery from a much longer one.
Formal training plus routine partner practice with a transceiver measurably improves how fast a buried skier gets found, compared with an untrained team fumbling through the same search in real time.
Check your regional avalanche bulletin every single day you plan to ski off-piste. Avalanche lists course providers across the US, and most alpine countries run equivalent public bulletins and certified course programs. A one or two-day avalanche awareness course is the single best investment you can make before your first unguided run. If you’re newer to the terrain, hiring a local guide isn’t a crutch. It’s the fastest way to learn a mountain’s specific hazards, and many resort areas offer trip-specific insurance that covers off-piste rescue, which standard travel policies often exclude.
How Do You Start Skiing Off-Piste Safely?
A realistic readiness benchmark: you should be comfortable and relaxed on red runs in variable, less-than-perfect snow before venturing off-piste. If bumpy or crusty groomed terrain still rattles you, that’s the skill to build first.
- Book a guided off-piste lesson or small group session at a resort known for accessible powder terrain.
- Take a one or two-day avalanche awareness course before any unguided outing.
- On the day itself, work through a short checklist: check the local avalanche bulletin, pack your transceiver, probe, and shovel, agree on a partner plan and turnaround time, plan your route in advance, carry a charged phone or radio, and confirm your gear hire if you’re renting.
This sequence, moving from guided lift-adjacent powder to a formal course before self-guiding, mirrors how most ski schools structure beginner progressions for good reason. Skipping steps is where most bad decisions start.
How Do You Plan a Trip That Includes Off-Piste Skiing?
Picking the right resort matters as much as picking the right gear. Look for destinations with accessible guided off-piste programs, ski and avalanche-kit rental on site, and a range of terrain so you can build up gradually rather than committing to one big descent. Book lessons, guides, or avalanche courses well ahead of peak weeks, since good instructors fill up fast during holiday periods, and confirm your travel insurance actually covers off-piste rescue before you go.
A tight packing list helps: rescue kit, layered clothing, a repair kit, and any rented gear confirmed in advance. Always check local rules, since boundary policies and guide requirements vary by resort and country, a point worth confirming with each destination directly. If narrowing down where to go feels like its own project, a service like Bergme’s questionnaire-based matching can shortcut the search by surfacing trips with guided off-piste access already built in.
A Realistic Path Into Off-Piste Skiing
Guided first days remove most of the guesswork that trips up new off-piste skiers, from route-finding to reading a slope’s aspect correctly. Curated trip planning matters just as much: pairing the right resort, the right guide, and the right timing turns a risky first attempt into a manageable one.
— Eduard
Find a Guided Off-Piste Trip Through Bergme
An alternative to endless resort-by-resort research for skiers ready to try off-piste terrain is to answer a short questionnaire and get trip options that already account for skill level, group size, and guided off-piste access.

The questionnaire filters for resorts with beginner-friendly guided off-piste programs, so you’re not stuck comparing raw terrain stats trying to guess which mountain fits your ability. It also surfaces accommodation and package pricing during peak weeks. If you’re ready to turn this guide into an actual trip, start the questionnaire and see which guided off-piste options match what you’re looking for.