28 August 2026
3 Bookings That Make Ski Touring Basics Safe for Beginners
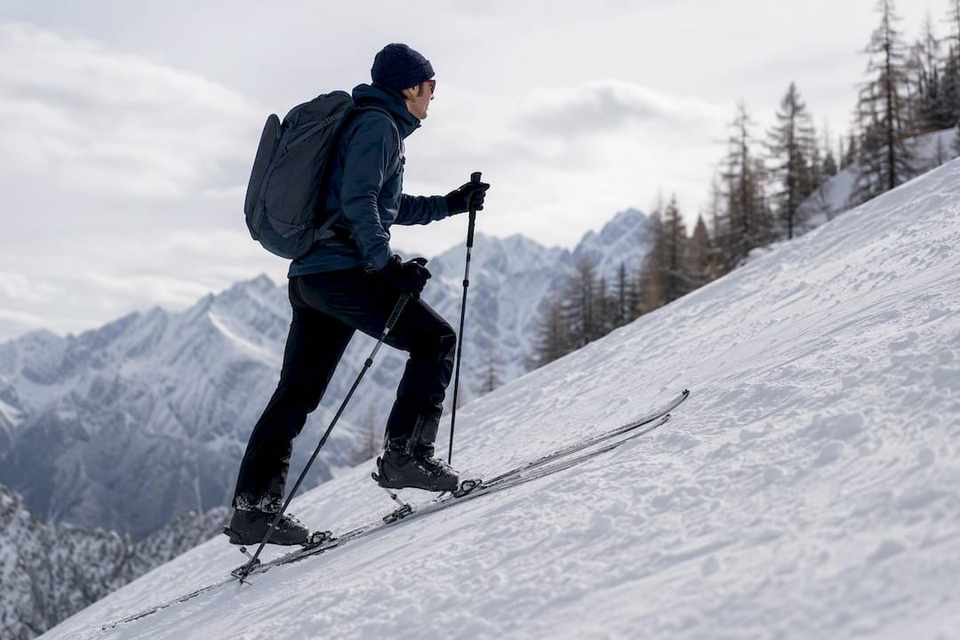
Ski touring means climbing a slope on skis fitted with skins for grip, then removing those skins to ski back down. It requires a free-heel binding setup, competent alpine ski technique, and either an avalanche safety kit with real training or a guided introductory day. Most beginners should start on a resort skin track or book a guided intro rather than heading straight into unmarked terrain.
TL;DR:
- Beginners should rent specialized touring skis, bindings, and boots to avoid unnecessary purchases and ensure proper setup.
- Proper uphill technique, including flat skis, pole timing, and heel riser use, significantly reduces energy wastage during ascent.
- Avalanche safety training and practicing with rescue gear are essential, with one-day courses teaching terrain recognition and rescue protocols.
- Planning routes with minimal elevation gain, clear risk levels, and fixed turnaround times enhances safety and prevents overexertion.
- Always check current weather and avalanche conditions before each trip and carry navigation tools alongside the rescue gear.
Table of Contents
- Ski Touring Basics: Your Quick-Start Checklist
- How to Skin, Kick Turn, and Transition Like You’ve Done This Before
- Avalanche Safety Basics: What You Need Before You Need It
- Choosing Beginner-Friendly Gear: What Actually Matters
- Getting Fit and Finding Safe Places to Practice
- Planning Your First Tour Without Overreaching
- What to Pack: Daypack and Layering Basics
- The Mistakes That Trip Up Almost Every Beginner
- Sharing the Skin Track Responsibly
- Beyond Avalanches: Other Hazards Worth Knowing
- Finding Your Way: Map, Compass, and GPS Basics
- Why Guided Days Change the Learning Curve
- Book a Beginner-Friendly Guided Tour With Bergme
- Where to Go for Official Training and Bulletins
- Sources
Ski Touring Basics: Your Quick-Start Checklist
Before your first outing, you need gear, a safety kit, and at least one booking on the calendar. Renting is the smart move for a first season. Touring bindings, boots, and skins are specialized equipment, and buying before you know your preferred style of touring often means buying twice.
Here’s what to sort out before you leave the house:
- Touring skis, bindings, and boots: rent a package built for uphill travel, not a resort ski repurposed with a heavier binding.
- Skins: matched to your ski length, these strips of climbing material provide the grip that makes ascent possible.
- Poles: adjustable length works best, since you’ll want them longer on the climb and shorter on the descent.
- Touring backpack: something with a dedicated compartment for a shovel and probe, roughly 25 to 35 liters.
- Avalanche transceiver, shovel, and probe: the holy trinity of rescue gear, non-negotiable for anything beyond a resort skin track.
- Layered clothing: a moisture-wicking base, a light insulating piece, and a shell, since touring generates far more heat than lift-served skiing.
For bookings, three things belong on your list this week: a guided beginner tour, a transceiver or avalanche fundamentals course, and a day on a resort’s designated skin track to test your gear before committing to anything remote. Booking the guided day first solves a lot of problems at once. It gets you technique coaching, a safe route, and hands-on practice with your safety kit in a single outing.
How to Skin, Kick Turn, and Transition Like You’ve Done This Before
Uphill technique is where most beginners waste energy in their first few tours. Get this right early and everything downstream, literally, gets easier.
1. Keep skis flat and stride, don’t shuffle. The biggest technique error beginners make is lifting the ski too much or dragging it in a stiff shuffle. Keep the ski flat against the snow and commit to a full stride, letting the skin’s grip do its job. Dynafit’s technique guidance frames this as the single most energy-efficient habit to build early, and it’s the one instructors correct most often.
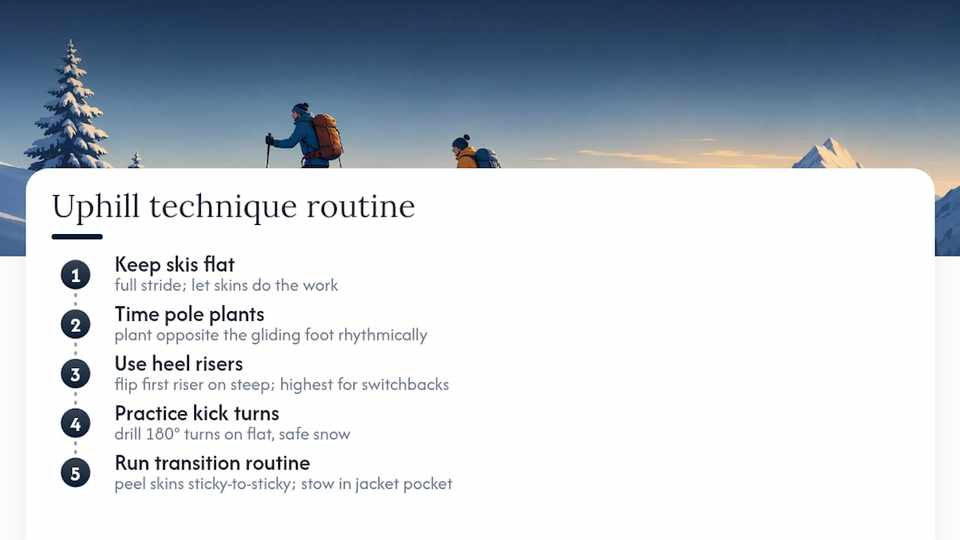
2. Time your poles to your stride. Plant the pole on the opposite side as your gliding foot, the same rhythm you’d use in cross-country skiing. This isn’t cosmetic. Proper pole timing keeps your upper body balanced over the ski, which matters more on side-hill traverses than flat terrain.
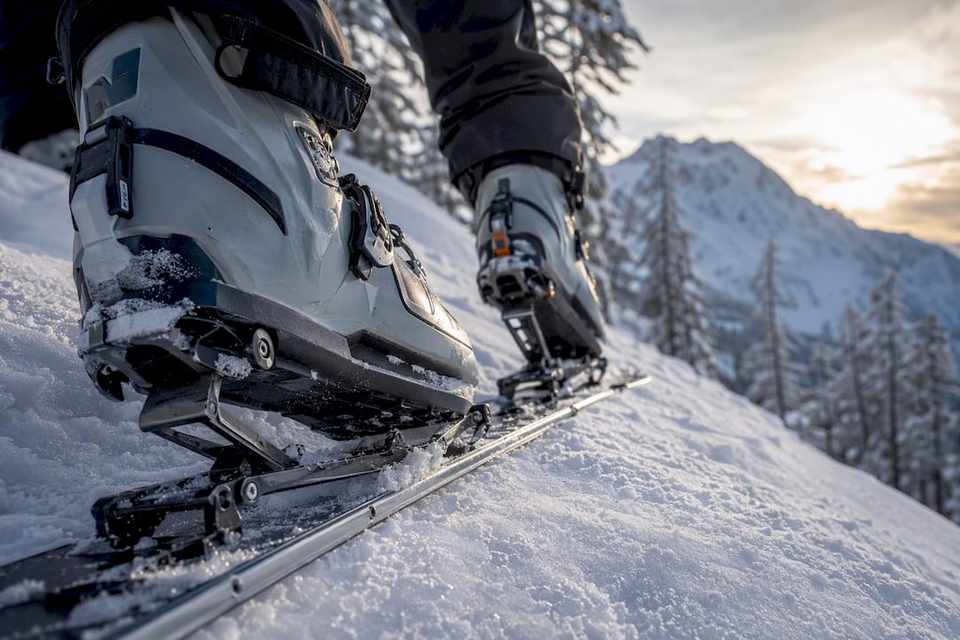
3. Use your heel risers once the pitch steepens. Most touring bindings have two or three riser positions. Flat terrain calls for no riser at all, since it keeps your foot in a natural walking position. Once the slope steepens, flip up the first riser to reduce calf strain, and save the highest setting for genuinely steep switchbacking sections. Skipping risers on steep pitches is how beginners blow out their calves by lunchtime.
4. Practice kick turns on flat ground first. The kick turn, the maneuver that lets you reverse direction on a switchback without losing your uphill grip, intimidates almost every beginner. The fix is embarrassingly simple: practice it on a flat patch of snow with no consequences before you try it on an actual switchback. Plant your uphill pole, swing the downhill ski around 180 degrees, weight it, then bring the other ski around to match. Drilling this on flat ground before you need it on a real slope is what separates a smooth ascent from a series of falls at every corner.
5. Run a consistent transition routine at the top. Peel your skins (fold them sticky-side to sticky-side to keep them from freezing), stow them in an inside jacket pocket to keep the glue warm, secure your ski tails, flip your bindings into ski mode, and do a quick check of your buckles and pole length before dropping in. Consistency here matters more than speed. A routine you run the same way every time is a routine you won’t forget a step of when you’re cold and tired.
Pro Tip: Practice your entire transition routine at home, fully dressed, with your pack on. Ski areas are cold, windy, and unforgiving places to discover you don’t know which pocket your skin glue goes in.
Kick turns deserve extra attention because they’re the technique most beginners never practice until they desperately need it. Set aside twenty minutes on a gentle slope, ideally one with zero exposure, and run the sequence ten times in each direction. The muscle memory you build there transfers directly to switchbacks under real conditions, where hesitation costs you balance more than any physical mistake.
Avalanche Safety Basics: What You Need Before You Need It
Avalanche education isn’t optional gear you add later. It’s the foundation the rest of ski touring sits on, and skipping it is the single riskiest shortcut a beginner can take.
Organizations like AIARE in North America and national avalanche centers elsewhere teach the core skills: reading terrain, interpreting bulletins, and running a companion rescue. A one-day introductory course won’t make you an expert, but it will teach you to recognize the terrain features that kill people, and that knowledge changes every route decision you make afterward.
The holy trinity of rescue gear works together, and none of the three pieces functions alone:
- Transceiver (beacon): transmits and receives a signal so a buried skier can be located.
- Shovel: for digging out a buried companion, ideally a metal blade rather than plastic, which can shatter in dense snow.
- Probe: a collapsible pole used to pinpoint a buried person’s exact location before you start digging.
Carrying this kit without practicing with it is close to useless. The Ski Club of Great Britain is blunt about this: owning a transceiver means nothing if you can’t run a burial search in under three minutes under pressure. A companion buried in avalanche debris has a survival window measured in minutes, not hours, which is why rescue speed and practiced technique matter more than the gear itself.
Before any tour, checking the local weather forecast and the official avalanche bulletin is a habit every experienced tourer treats as automatic. Bulletins rate danger on a five-level scale and typically break down risk by elevation band and slope aspect. Learning to read one takes practice, but the basics are approachable:
- A bulletin rating of “considerable” or higher on slopes matching your planned route is a signal to change your plan, not push through it.
- Slope angles between 30 and 45 degrees carry the highest avalanche risk; flatter or steeper terrain is statistically safer, though never risk-free.
- Terrain traps, gullies, cliff bands, or dense trees below a slope, turn a small slide into a serious injury by concentrating debris.
- South-facing slopes warm and destabilize faster in sun; north-facing slopes hold weak layers longer into the season.
Guided beginner days reduce your exposure to all of this by putting someone with years of terrain judgment in charge of the route decision while you focus on technique. That’s not a crutch. It’s the same logic behind a student pilot flying with an instructor before solo flight.
Choosing Beginner-Friendly Gear: What Actually Matters
Touring equipment splits into distinct categories, and knowing which one you’re renting or buying prevents a lot of frustration on your first few outings.
Salomon’s breakdown of touring styles is a useful mental model: race setups prioritize minimal weight above all else, mountain touring balances climbing efficiency with reasonable descent performance, and freetouring sacrifices some uphill ease for a ski that skis better on the way down. Beginners almost always want mountain touring gear. It’s forgiving on the climb without feeling like a plank once you point it downhill.
A few practical priorities for your first setup:
- Ski weight and width: lighter skis climb easier but can feel unstable at speed; a mid-width ski (roughly 85 to 95mm underfoot) is the common sweet spot for learning.
- Binding type: tech bindings (pin bindings) are lighter and standard for serious touring, while frame bindings resemble regular alpine bindings and are easier to use but heavier; many beginners rent a frame setup first because it feels familiar.
- Boot fit and walk mode: a boot with a generous walk mode range lets your ankle move naturally on the climb; a stiff, ski-only boot will make skinning miserable regardless of how good your technique is.
- Skins: mohair skins glide better and weigh less, nylon skins grip better and last longer, and most rental shops issue a nylon blend that splits the difference.
- Pack size: 25 to 35 liters is enough for a day tour once you factor in the avalanche kit, extra layers, and food.
Renting for your first several outings isn’t just about cost. It lets you test frame versus tech bindings and different ski widths before committing money to a setup that might not suit how you actually ski. Most touring shops can outfit a complete beginner kit, and many bundle it with the guided intro day mentioned earlier, which solves two problems in one booking.
Getting Fit and Finding Safe Places to Practice
A typical day tour involves 600 to 1,200 meters of ascent over two to four hours, which is a meaningful cardiovascular effort even for someone who skis resorts regularly every winter. You don’t need to be an athlete, but you do need a baseline of sustained aerobic fitness. Hiking, cycling, and stair climbing in the months before your first tour all translate directly.
Resort skin tracks are the ideal place to build both fitness and technique without avalanche exposure, since patrolled terrain removes the single biggest variable beginners aren’t yet equipped to judge. Starting there rather than in remote backcountry lets you make technique mistakes, including a wobbly kick turn or a mistimed pole plant, without any real consequence.
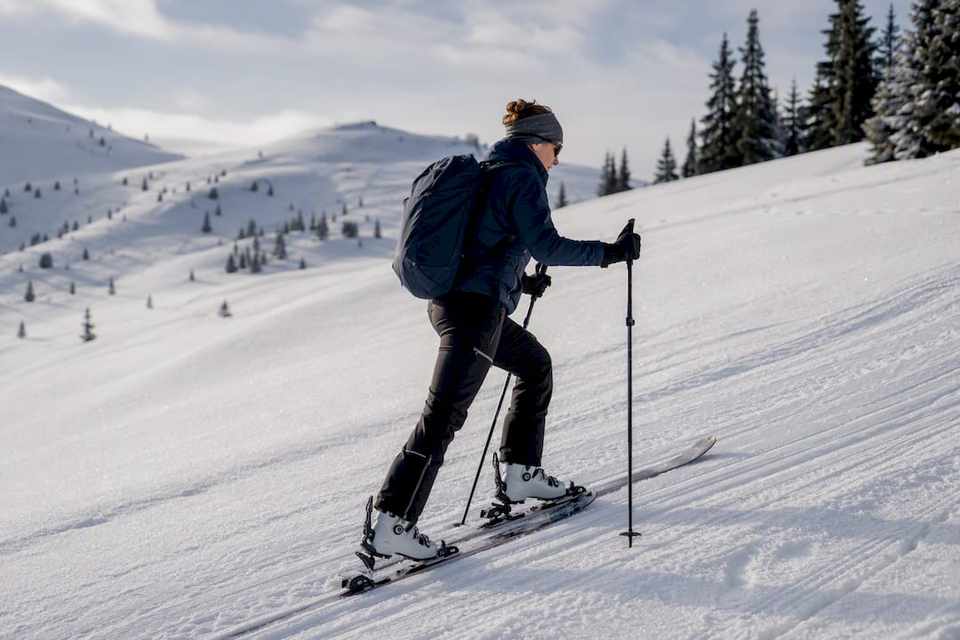
A guided intro day typically covers gear setup, skinning technique, at least one kick turn drill, and a basic transition, often paired with a hands-on transceiver search. Choose a provider who spells out exactly what’s included rather than a vague “backcountry taster.”
Pro Tip: Short, repeated ascents beat one long grinding climb when you’re building technique. Five 15-minute laps on a resort skin track, each ending with a deliberate transition, teach your body far more than a single 90-minute slog.
Planning Your First Tour Without Overreaching
A good first tour is boring by design. Save the ambition for your fifth or sixth outing, once you’ve built a feel for pacing and terrain.
Run through this sequence before you commit to a route:
- Check the avalanche bulletin and weather forecast the night before and again the morning of. Conditions shift, and a bulletin from two days ago tells you nothing reliable.
- Pick a route with under 600 meters of ascent and slope angles well clear of the 30 to 45 degree danger band. Save steeper, longer objectives for once you’ve logged real hours.
- Confirm the route stays close to help. Proximity to a resort boundary, a road, or another party matters more than scenery on a first outing.
- Set a firm turnaround time before you leave, and honor it regardless of how close the summit feels. Most accidents happen on the descent, when parties push past their planned window and end up skiing tired terrain in fading light.
- Agree on group communication rules. Decide who leads, how you’ll signal a stop, and what the plan is if someone needs to turn back early.
- Identify a bailout route. Know, before you start climbing, where you’d exit if weather or fatigue forces an early end to the day.
Emergency planning rounds this out. Carry a phone with a downloaded offline map, tell someone not on the tour where you’re going and when you expect to be back, and pack basic first aid alongside your avalanche kit. None of this is glamorous, but it’s the difference between a bad afternoon and a genuine emergency.
What to Pack: Daypack and Layering Basics
Your pack contents matter as much as your ski setup, and a beginner’s list is shorter than you’d think.
- Safety kit: transceiver, shovel, probe, always on your body or in the top of the pack, never buried at the bottom.
- Spare insulating layer: your body cools fast the moment you stop moving at the summit.
- Food and water: more than you think you’ll need; touring burns calories quickly.
- Repair items: a multi-tool, spare ski strap, and duct tape wrapped around a pole cover more failures than you’d expect.
- Extra batteries: cold drains transceiver and phone batteries faster than most beginners anticipate.
- Sunglasses and goggles: bring both, since bright ascents and flat-light descents demand different eyewear.
Layering follows a simple logic: dress slightly cold at the trailhead, because you’ll warm up fast on the climb, then add your insulating layer immediately at the transition before you cool down on the descent. Skins get folded sticky-side together and tucked into an inside jacket pocket, not the outer pack pocket where the glue can freeze stiff.
The Mistakes That Trip Up Almost Every Beginner
Most beginner problems trace back to one of three habits: picking a route too ambitious for your fitness, setting an unsustainable pace early and paying for it later, or skipping formal training because a friend offered to “show you the ropes” informally.
Run this red-flag check the morning of your tour:
- Bulletin rating “considerable” or higher on slopes matching your route? Reconsider the plan.
- Anyone in the group missing a piece of the holy trinity or unpracticed with it? Don’t go.
- Weather forecast showing wind loading, new snow, or rapid warming? Choose a lower-risk alternative.
- Group uncertain on the turnaround time? Set one before you leave the parking lot.
Two behavioral habits reduce risk more than any piece of gear: pace yourself conservatively on the climb rather than matching a stronger partner, and treat your turnaround time as fixed rather than negotiable once the summit is in sight.
Sharing the Skin Track Responsibly
Ski touring areas are shared spaces, and a handful of etiquette habits keep them functional for everyone. Uphill traffic generally yields right of way to downhill skiers, since a descending skier has far less control to stop suddenly. Stick to established skin tracks rather than cutting fresh lines across them, since a poorly placed boot pack or skin track can ruin the climbing line for everyone who follows.
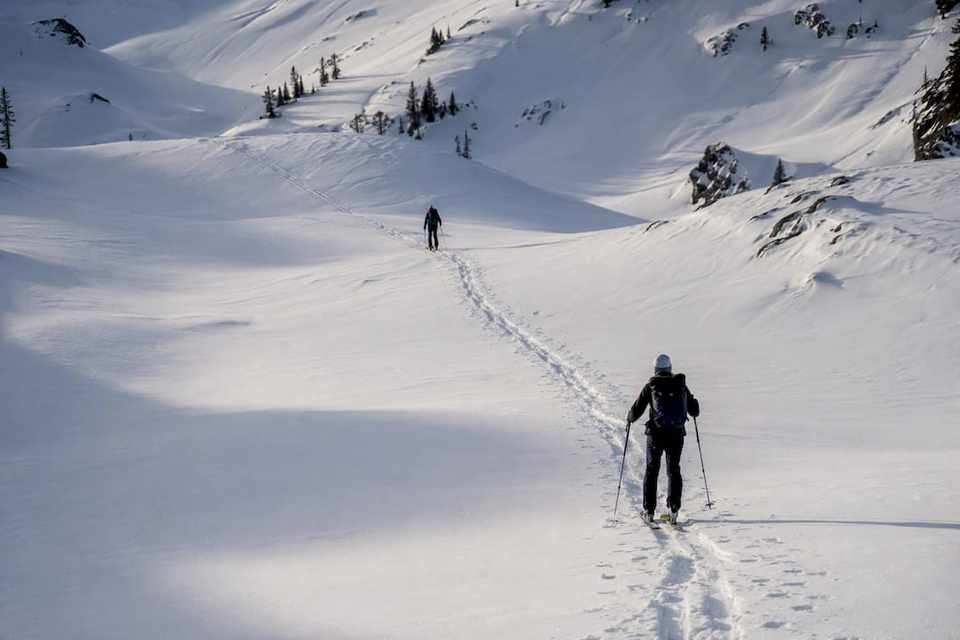
Pack out everything you bring in, including energy bar wrappers and tape scraps, and resist the urge to build fresh switchbacks across a track someone already set efficiently. If you’re touring inside a resort boundary, check the specific rules for skinning hours. Many resorts restrict uphill travel to before opening or after grooming operations to avoid conflicts with machinery and downhill traffic.
Respect wildlife closures and seasonal restrictions, which often protect calving grounds or nesting areas during specific months. These closures aren’t bureaucratic overreach. They protect habitat that skiers and animals both depend on long after the season ends. Give other groups space at popular trailheads and summits rather than crowding a transition zone, and keep noise down in areas where wildlife activity is posted. None of this is complicated, but it’s the kind of consideration that keeps touring areas welcoming rather than contentious as backcountry travel grows more popular every season.
Beyond Avalanches: Other Hazards Worth Knowing
Avalanches get most of the attention, but they’re not the only terrain hazard that can end a tour badly. Tree wells, the loose, unconsolidated pockets of snow that form around the base of conifers, can trap a skier headfirst in deep powder, and self-rescue from one is notoriously difficult. Skiing near trees after a big storm calls for a buddy system: keep a partner in sight and check in regularly rather than spreading out through timber.
Cornices, the overhanging lips of wind-deposited snow that build along ridgelines, can collapse under a skier’s weight and trigger a slide on the slope below. Giving cornices a wide berth from above, rather than skiing right along the edge to peek over, avoids the problem entirely. Glacial terrain adds crevasses, hidden cracks in the ice that can be invisible under a thin snow bridge. This is specialized terrain that requires roped travel and crevasse rescue training beyond what a beginner tour should ever involve; if a route crosses glaciated ground, that’s a guide’s job, not a solo learning opportunity.
The common thread across all three hazards is the same: know what terrain you’re entering before you enter it, and treat unfamiliar features (dense trees, ridgelines, glaciers) as reasons to slow down and ask questions rather than reasons to push forward.
Finding Your Way: Map, Compass, and GPS Basics
Route finding on a ski tour is a different skill than following a marked resort run, and it’s worth building even if you’re touring with a guide at first. A paper map with the route marked and the terrain contours studied beforehand remains the most reliable backup, since batteries die and screens crack, but electronics fail in cold in ways paper never does.
A basic compass, paired with the ability to identify your position relative to visible landmarks, lets you confirm you’re on the intended slope even in flat light or reduced visibility. GPS apps and dedicated devices add real value for tracking your ascent route so you can retrace it precisely on the way down, particularly useful if weather rolls in and visibility drops.
The habit worth building early: check your position against the map periodically during the climb, not just when you’re already unsure where you are. Waiting until you’re disoriented to pull out navigation tools is how small route errors become genuine problems. Cross-reference your planned route with the terrain features called out in the avalanche bulletin, since knowing your exact aspect and elevation matters as much for navigation as it does for risk assessment.
Why Guided Days Change the Learning Curve
Beginners who start with a guided introduction consistently progress faster than those who piece together technique from videos and trial and error. That’s not a knock on self-teaching. It’s simply that a guide compresses months of terrain judgment and technique correction into a single day, catching habits like a stiff kick turn or a poorly timed pole plant before they become ingrained.
Bergme’s questionnaire approach exists for exactly this stage of the sport. Rather than scrolling through generic resort listings, you answer a handful of questions about your experience level, group makeup, and what you’re hoping to get out of a trip, and the matching engine surfaces beginner-appropriate destinations and packages that fit those specifics. For someone weighing a first guided tour against a dozen unfamiliar resort names, that kind of targeted narrowing solves a real planning headache.
The gap between a good first ski touring experience and a discouraging one usually comes down to matching the trip to the person, not the person to whatever trip happened to come up first in a search. That’s the piece worth getting right before anything else.
— Eduard
Book a Beginner-Friendly Guided Tour With Bergme
Bergme is the alternative to scrolling through dozens of resort websites trying to guess which one actually suits a first-time tourer. Instead of researching lift-served terrain, rental shops, and guided-day availability separately across a dozen tabs, you answer a short questionnaire and get matched to curated packages that already account for your experience level and group.

That matters most in your first season, when you don’t yet know which questions to ask a resort about beginner terrain, rental availability, or guide options. A package like the New Year ski holiday in Interlaken, which bundles a hotel stay with a ski pass, is the kind of curated option that removes the guesswork of piecing together lodging, lift access, and logistics on your own. If you’re ready to turn this guide into an actual trip, check current availability and pricing for that Interlaken package and see whether it fits your dates.
Where to Go for Official Training and Bulletins
Technique guides and gear reviews are useful, but they’re not a substitute for certified instruction and current conditions data. AIARE and national avalanche centers run the courses worth prioritizing before any unguided outing, and Dynafit’s technique tutorials are a solid reference for drilling skinning and kick turns between seasons. Before every single outing, without exception, check your region’s official avalanche bulletin and local weather forecast. Conditions change fast, and yesterday’s bulletin is not today’s answer.